April 24, 2013

Paneer Tikka Masala

I wish I 'd never known you 'Mr. Paneer'. Seriously!! During my school & college times, I didn't know you even existed. I was all happy & fine until I got to know you. Wanna know why? Though you are rich, delicious & satisfying, you are also fat-rich & addictive. And, that doesn't work for me! Still, I am so obsessed with you that if I don't see (use) you for atleast twice a week, I get all sad & sober until I see you again. 

Is there an easy way to get out of this affair with paneer?! Someone, please help me!!


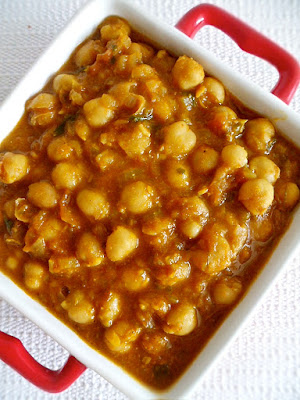
This recipe of paneer tikka masala is remarkably good and worth a try! Especially with kasoori methi, home-made tandoori masala powder & marinated paneer, gravy was so tasty & satisfying. Mine was slightly on the spicier side, so if you want it mild adjust chilli powder accordingly. For a richer version, use heavy cream. But, the tikka gravy was equally good with just milk. No complaints whatsoever!


Basic Info
Complexity - Medium
Prep time - 1.5 hrs (includes marination time)
Cook time - 30 mins
Serves - 4

Ingredients
For the Marinade
Paneer - 30 cubes
Greek Yogurt - 1/4 cup (or use any thick yogurt)
Ginger - 1 inch (grated)
Garlic - 2 pods (minced)
Chilli powder - 1 tsp
Tandoori Masala powder - 1 tsp
Garam Masala powder - 1 tsp
Kasoori Methi - 1 tsp
Lemon juice - 2 tsp
Salt - to taste

For the Tikka
Green bell pepper, medium sized - 1/2 no (cut into 1 inch squares)
Onion, medium sized - 1 no (cut into 1 inch squares)
Tomato, medium sized - 1 no (cut into 1 inch squares)

For the Gravy
Tomatoes, medium sized - 3 nos (blend it into fine paste)
Milk - 1 cup (or use 1/2 cup of fresh cream, I used whole milk)
Cumin seeds - 1 tsp
Ginger - 1 inch (grated)
Chilli powder - 1 tsp
Garam masala powder - 1 tsp
Coriander powder - 1 tsp
Kasoori Methi - 1 tsp
Cilantro - 1 tbsp (chopped)
Oil - 1 tbsp

Method
Mix all the ingredients listed under 'For the Marinade' and make sure that each paneer is coated well with yogurt & spices. Refrigerate for atleast an hour. Heat about a tsp of oil in a wide pan, toast paneer pieces until golden brown, drain excess oil in a tissue and set aside.

Add rest of the oil, and when hot add cumin seeds and let them crackle. Add onion, ginger, garlic, bell pepper and saute until onion is translucent & bell pepper is soft.

To this, add tomato puree, chilli powder, garam masala, coriander powder, salt and mix well. Sprinkle little water and let it cook until raw smell of the tomatoes is gone. Once the oil starts to ooze out and the gravy becomes thick, reduce heat and add milk (or fresh cream if you are using), kasoori methi & paneer.

Adjust the consistency as you prefer, and let the gravy simmer for couple of mins. Finally, add cilantro, stir well and remove from heat.


Enjoy hot with rotis/naan!


Notes
- Do not skip kasoori methi as it adds a remarkable flavor to the gravy.
- While toasting paneer pieces, make sure the pan is not crowded. Do it in batches if using a smaller pan.
- If possible, prepare Tandoori Masala powder at home. This sure kicks the flavor up a few notches.
- Add more or less water to adjust the gravy to the required consistency.
- Don't miss to check-out the healthier version of this recipe with tofu here.

April 23, 2013

Shri Rama Navami

The Ramayana is one of the two great epics of India. Ramayana tells the story of Lord Rama, one of the most revered & celebrated Gods through out India.  He is the seventh incarnation of the Hindu supreme God Vishnu. The purpose of this Ramavatar is to kill Ravanasuran, destroy evil and establish dharma.

Lord Rama is portrayed as an epitome of virtue through-out Ramayana. Lord Rama is praised for some of the finest qualities like patience, truthfulness, conduct, compassion, courage, knowledge, veneration for elders, monogamy (eka patni vridham) etc., and he is said to have possessed & mastered all these qualities even during the harsh tests of time. In a sense, Ramayana explores human values and the concept of Dharma.

The life of Rama starts as the eldest son of King Dasaratha. To fulfill a promise made by his father, Lord Rama exiles to forest for 14 years along with his wife Sita, and his brother Lakshmana. In the forest, Sita gets abducted by Ravana, king of Srilanka. The story, then goes on to depict how Rama kills Ravana with the help of Vanarasena (army of monkeys) and saves Sita.

Shri Rama Navami is a Hindu festival to celebrate Lord Rama 's birthday. On this day, Lord Rama's devotees observe fasting, read/listen to Ramayana, prepare panagam, neer more, moongdal kosumalli, sweet (usually payasam) for neivedhyam.


There are some interesting stories behind offering these as prasadam. Lord Rama having to spend about 14 years in the jungle lived mostly on panagam (a drink made of jaggery & lime juice), neer more (flavored buttermilk), kosumalli (made of moongdal) and so, we prepare these items to remember & praise all the hardships that Lord Rama went through during his exile. There is another version which says that we offer panagam & neer more to cool Lord Rama down as Shri Rama Navami usually falls at the start of Summer.

Check out my posts on Shri Rama Navami specials.
Panagam
- Neer More
- Moongdal Kosumalli
- Kadalai Paruppu Payasam

Kadalai Paruppu Payasam

Even before sugar came to Indian market, south Indians used jaggery (palm sugar) to make sweets. Jaggery is supposed to be healthier than its 'processed' counter-part. Kadalai paruppu payasam is made with channa dal & moong dal and using jaggery gives it a rich, denser texture and a nice, warm brown color.


Basic Info
Complexity - Medium
Prep time - 30 mins
Cook time - 20 mins
Serves - 3

Ingredients
Kadalai paruppu / Channa dal - 1/2 cup
Paasi paruppu / Moong dal - 1/4 cup
Powdered jaggery - 1 cup
Cardamom powder - 1-2 pinches
Cashew nuts - 6-8 nos (broken)
Raisins - 6-8 nos
Milk - 1/2 cup (boiled & cooled)
Ghee - 1 tbsp

Method
Roast cashews & raisins in 1/2 tsp of ghee until golden brown and set it aside.


Roast channa dal & moong dal in a tsp of ghee until you get a nice aroma. Pressure cook dal for 2-3 whistles.

In a small saucepan, heat jaggery & 1/4 cup of water until the jaggery completely dissolves in water. Then, add the pressure cooked dal (slightly mashed) and allow it to boil until the raw smell of jaggery goes off and the mixture becomes thick.

Remove from heat, add cardamom powder, milk and mix well. Finally, garnish with cashews & raisins.

Payasam is ready to be served.


Notes
- Channa dal & moong dal can be coarsely mashed up for creamier consistency.
- Check out the other Shri Rama Navami specials here.

Moong Dal Kosumalli

South Indian salad made from moong dal and seasoned with mustard seeds, hing and green chillies. Grated carrots / cucumber / raw mango makes a healthy and tasty addition.


Basic Info
Complexity - Simple
Prep time - 1.5 hrs (includes soaking time)
Cook time - 15 mins
Serves - 3

Ingredients
Moong dal - 1 cup
Carrot - 1 no (grated)
Raw Mango - 1/4 cup (grated, optional)
Cucumber - 1/4 cup (grated, optional)
Green chillies - 1 no (finely chopped)
Grated Coconut - 1/4 cup
Lime juice - from 1 lime
Cilantro - 1-2 tbsp (finely chopped)
Oil - 1 tsp
Mustard seeds - 1 tsp
Hing - 1 big fat pinch
Salt - to taste

Method
Soak moong dal in water for atleast an hour and drain off the excess water in a strainer. Leave it in strainer for sometime so that the water is completely strained off.

In a mixing bowl, add moong dal, coconut, carrot, raw mango, cucumber, cilantro and mix well.

In a small pan, heat oil and splutter mustard seeds. Add chillies, curry leaves, hing and fry for few seconds. To this, add the moong dal mixture, salt and give it a good mix. Remove from heat. Finally, add lime juice and mix well.

Serve it as a snack / part of a meal.


Notes
- Check out the other Shri Rama Navami specials here.

Neer More (Flavored Buttermilk)

According to me, cow's milk is the most versatile ingredient of all and a staple for most of us, Indians. Buttermilk, Yogurt, Cream, Butter, Ghee, Khoa, Paneer - by-products galore!! 

Traditional buttermilk is the slightly sour liquid that is left behind after churning butter out of cream. Being a by-product of the churning process, buttermilk contains negligible amount of fat, is very light and good for health. In a 'h-o-t' place like India, buttermilk serves as a thirst quencher & body coolant from generations ago.


Infact, it has been a tradition to set-up free buttermilk stalls at bus-stops & street-corners during summer for passers-by to quench thirst. Free buttermilk stalls is a common sight in temples especially during festival times. The trick for naturally cold and refreshing buttermilk is to store it in earthen pots, it tastes way better than the refrigerated ones!

Basic Info
Complexity - Simple
Prep time - NA
Cook time - 15 mins
Serves - 3 cups

Ingredients
Yogurt - 1 cup
Cold water - 2 cups
Salt - to taste
Hing - 1 big fat pinch
Ginger juice - 1-2 tsp (grate about an inch of ginger, extract only the juice from it)
Oil - 1/2 tsp
Mustard seeds - 1/4 tsp
Green chillies - 1 nos (cut into half)
Curry leaves - 3-4 nos (chopped)
Cilantro - 1/2 tbsp (chopped)

Method
Churn yogurt & water with salt, ginger juice, hing until everything gets mixed without any lumps.

In a small pan, heat oil and splutter mustard seeds. Add chillies, cilantro, curry leaves and remove from heat.

Add this to the buttermilk and mix well. Serve cold.


Notes
- Check out the other Shri Rama Navami specials here.

April 17, 2013

Almond Butter Cookies

Sometimes, my health conscious alter-ego convinces me into buying ingredients that are too healthy to be appreciated by my family! And, that's how a tall bottle of almond butter found its way into my pantry. More the ways I find to use it (as a spread, in a drink, etc), more my family seemed to resent it. So, I was desperate to somehow use it up and get over with it. 

Have you ever gotten yourself into such a situation before?


Suddenly, this idea of making cookies with it struck me. That way, I could use a cup or two of almond butter rather than a few spoonfuls. "Yuck, No!" was the response from my daughter when I shared the idea of making cookies with almond butter. Thanks to chocolate chips, convincing job only got a little easier!


As I was prepping up, my daughter happily helped me, right from mixing the dry ingredients to whisking butter & almond butter to finally rolling the dough in sugar. My oven took exactly 12 mins to bake.


Right at the 10 min mark, the sweet aroma of butter & almond filled up the entire house, that my hubby & my daughter couldn't wait to taste the cookies. Every other minute, they would walk into the kitchen to check if its done. Keeping them away got even tougher after I got the cookies out of the oven. 

You have to believe me, half of the batch got over in less than 10 mins, and they didn't give any time for the cookies to cool. I had to literally 'shoo' them away to save the remaining cookies for me & my photographs. Phew!!!


Btb, my daughter completely forgot about the almond butter in her cookies and was busy munching one after another!!

Basic Info
Complexity - Simple
Prep time - 20 mins
Cook time - 25 mins (includes cooling time)
Serves - approx 3 dozen cookies

Ingredients
All-purpose flour - 1 1/4 cups
Baking soda - 3/4 tsp
Baking powder - 1/2 tsp
Salt - 1/4 tsp
Unsalted butter - 1/2 cup (1 stick softened)
Almond butter - 1 cup (at room temperature, smooth)
Sugar - 3/4 cup + 1 tbsp for sprinkling
Light brown sugar - 1/2 cup (tightly packed)
Oil - 1/4 cup (or Egg - 1 no)
Milk - 1 tbsp
Vanilla extract - 1 tsp
Semi-sweet chocolate chips - 1/2 cup (optional)

Method
Preheat oven to 350 degrees F. 

In a large bowl, combine well the flour, baking soda, baking powder & salt. Set aside.

In another bowl, beat butter and almond butter together until fluffy. Add the white & brown sugar and mix until smooth. Add oil, milk, vanilla extract and mix well.

To this, add the flour mixture and mix thoroughly. Stir in the chocolate chips.

Place the remaining 1 tbsp of sugar on a plate. Take about a tbsp of cookie dough, roll them in the sugar and place them on a greased cookie sheet. Leave about an inch between the cookies to spread. Use back of a spatula and gently press the cookie dough.


Bake for 10 to 12 minutes.


Let the cookies stay on the sheets for 5 mins, and then remove to the racks to cool completely.


Notes
- You can replace almond butter with peanut butter for peanut butter cookies.
- Right before baking, do not overly flatten the cookies.
- Do not over-bake. 10-12 mins will be just enough for them to bake.
- Cookies may appear to be underdone / may seem to fall apart, but will be alright & will set as it cools.

April 13, 2013

Aval Payasam

Month of April is festival time in South India, it marks the start of New Year. While people of Karnataka & Andhra celebrate New Year as Ugadi, Tamilians celebrate it as Varusha Pirappu and for Malayalis, it is Vishu!


Here is a simple & wonderful recipe of aval payasam that you can enjoy during any festival season!


Basic Info
Complexity - Simple
Prep time - NA
Cook time - 20 mins
Serves - 3-4

Ingredients
Thick Aval (poha) - 1/2 cup
Water - 1 cup
Ghee - 3 tsp
Cashews - 6-8 nos (broken)
Raisins - 6-8 nos
Whole Milk - 1 to 1.5 cups
Cardamom powder - 2 big pinches
Sugar - 1/3 cup

Method
Bring 1 to 1.5 cups of milk to a boil and keep it aside.

In a thick bottomed saucepan, heat a tsp of ghee, roast cashews & raisins until golden brown and set aside.

In the same pan, add rest of the ghee and roast aval until crisp. To this, add water and let the aval cook completely. Once aval is cooked through, add sugar and let it completely dissolve in the aval mixture and come to a light boil.

Remove from heat and add boiled milk, cardamom powder to the payasam and mix well.

Garnish with cashews & raisins and aval payasam is ready to be served!


Note:
- Add more or less milk depending on the consistency you want.
- Add more or less sugar depending on the sweetness you like.

April 12, 2013

Chole Masala

I have already posted a recipe for chole a.k.a channa masala here, a quicker & easier version. 

Yesterday, it was time for channa masala again! Yesterday 's version was too good that the intensely spiced bright red chole reminded me of what is being served in the restaurants. Incidentally, the day before VJ had chole at one of the North Indian restaurants for lunch and it turned out to be a total failure! So, when I told him that I will be posting this version as "Chole - Restaurant Style", he told me, "Why restaurant style? This tastes a lot better!". Now, that's what I call as a compliment!!!


The dry spice powder mix is the secret for perfect color, taste & texture! Paprika & turmeric gives it an appetizing orangish-red color, while coriander, cumin, red chilli, channa masala powder gives it a hot & spicy flavor base. Amchoor & lime juice adds a wonderful sour note at the end! 


Basic Info
Complexity - Medium
Prep time - 8-10 hrs (includes soaking time)
Cook time - 30 mins
Serves - 3

Ingredients
Cooked chickpeas - 3 cups
Cumin seeds - 1 tsp
Bay leaf - 1 no
Onion - 2 nos (medium sized, minced)
Garlic - 1 clove (minced)
Ginger - 1 inch (grated)
Green chilly - 1 no (minced)
Tomatoes - 4 nos (big sized, ripe)
Coriander powder - 1 tbsp
Cumin powder - 2 tsp
Red chilli powder - 1 tsp
Turmeric powder - 1/2 tsp
Amchoor powder - 1 tsp
Paprika - 2 tsp
Channa masala (MTR brand) - 2 tsp (replace it with garam masala)
Water - 1 cup
Salt - to taste
Oil - 1 tbsp
Lime juice - from 1/2 lime
Cilantro - handful (finely chopped)

Method
Soak chickpeas overnight and pressure cook for 4-5 whistles.

Bring a large pot of water to a rolling boil (large enough to cover 4 tomatoes with water), and carefully drop the tomatoes into boiling water. In a couple of mins, you should see the skin of the tomatoes coming off. At this point, remove the tomatoes from hot water and wash them under cold tap water. Peel off & discard the skin, crush the tomatoes and keep them ready.

Heat oil in a large skillet. When hot, saute bay leaf for a second and splutter cumin seeds.

Add onion, garlic, ginger, chillies and saute over medium heat until browned for about 5 minutes. Turn heat down to medium-low and add all of the dry masala powder - coriander, cumin, turmeric, red chilli, amchoor, paprika & channa masala. Cook it for a minute or two, and then, add the crushed tomatoes. Add water, salt and chickpeas and simmer uncovered for 10 minutes. Remove from heat and stir in lemon juice.

Garnish with chopped cilantro and serve hot with roti/poori/rice.


Note:
- Slightly over-cooking chickpeas is the trick to get tastier channa masala.
- Add more or less water depending on how thick you want the gravy to be.

April 6, 2013

Aviyal

Aviyal in literal sense means "mixture of vegetables", simmered in a spicy coconut based gravy. Aviyal is considered to be rich & festive and hence, no south Indian festival/marriage is considered complete without aviyal in the menu. Aviyal is very near & dear to me and I always look forward to this dish, be it a big wedding or a small function. I must say that the mixed vegetables gives aviyal a unique flavor and with every mouthful, as you get to bite into different taste & texture of different vegetables .. mmmmm .. yum is the word!!


History of aviyal seemed quite interesting (Thanks to wikipedia!), as it dates back to the times of Mahabaratha, when Bheema (one of the five Pandavas) wore his cooking hat (which he is supposedly not very good at!) in the kitchens of King Virata, during exile. Not knowing the basics of cooking, he simply chopped up different vegetables, cooked and garnished them with grated coconut, that later became popular as Aviyal.


This renowned dish takes different forms, uses different ingredients in different household. Some add turmeric powder for that yellowish tinge, but I grew up with my mom's white aviyal (though I like both the versions). Some use tamarind water for sourness, whereas my mom uses sour curd/yogurt instead. Some use cumin seeds to add to the flavor, but my mom says adding cumin seeds to aviyal will make it taste more like 'mor kuzhambu' than aviyal!


As for the vegetables, you could use any vegetable that doesn't lose its shape and mush up when cooked. Carrots, beans, peas, potatoes, broad beans (avarakkai), raw bananas, snake gourd, drumstick - an equal mixture of atleast 4-5 vegetables from the list would be just perfect for aviyal!

Basic Info
Complexity - Medium
Prep time - 30 mins
Cook time - 30 mins
Serves - 3-4

Ingredients
Vegetables - 3 cups (I used 1 raw banana, 1 potato, 10-15 beans, 2 carrots & 1/2 cup peas)
Water - 1/2 cup
Raw rice - 1 tbsp (Sona masoori works best)
Green chillies - 3 nos
Coconut - 1/2 cup (packed, freshly grated coconut is highly recommended)
Sour curd - 1/4 cup (I used greek yogurt which was souring in my fridge)
Coconut oil - 2 tbsp
Curry leaves - 2-3 sprigs
Salt - to taste

Method
Soak raw rice in water for atleast 20 mins.

In a deep saucepan, bring 1/2 cup of water to a boil. Add vegetables & salt. Cover and cook on medium flame until 3/4 th done. Over-cooking will mash up the vegetables.

In the meanwhile, grind coconut, chillies, soaked/drained raw rice into a thick & coarse paste.

Add this paste to the vegetables along with 1/3 cup of water and let it simmer on low flame for 3-5 mins.  Garnish with coconut oil, curry leaves and remove from heat. 

Add beaten yogurt (without any lumps) to the aviyal and mix well. Aviyal is ready to be served!


April 2, 2013

Mysore Rasam

According to me (and most of others who have tasted this rasam), mysore rasam is rich, exotic & aromatic. You taste it once, and get hooked on to this for the rest of your life!

Back at home, I am a big foodie of all. If at all there is someone to demand my mom of her recipes, that would be me! I am addicted to this rasam so much so that I have asked my mom to make it for me time & time again!


Basic Info
Complexity - Medium
Prep time - 25 mins
Cook time - 15 mins
Serves - 3-4

Ingredients
Tamarind - size of a large gooseberry
Tomatoes - 3 nos (medium sized, ripe)
Cooked & mashed Toor dal - 2-3 tbsp
Black Peppercorns - 3/4 tsp
Red chillies - 1 no
Coconut pieces - 12 small pieces (approx less than 1/4 cup of grated coconut)
Hing - 1 small piece
Oil - 2 tsp
Curry leaves - 1-2 sprigs
Rasam powder - 1 tsp
Salt - to taste

Method
Soak tamarind in hot water and extract about 2 cups of tamarind water. Keep it aside.

Add 1 cup of water to mashed toor dal, mix well and set aside.

Heat a tsp of oil, and fry hing, red chillies & black peppercorns until crisp & aromatic. Let it cool and grind along with coconut into a thick & smooth paste. Add as little water as required.


Boil tamarind water & chopped tomatoes along with salt & rasam powder for about 7-8 mins until the raw smell of tamarind goes off. To this, add the ground paste and let it come to a boil. Finally, add toor dal water and let it froth.

Remove from heat. Heat a tsp of oil, splutter mustard seeds and add it to the rasam. Garnish with curry leaves and hot & tasty rasam is ready to be served.

Paruppu podi

Toor dal / Tuvar dal (split pigeon peas) is one of the most popular pulses in southern part of India. Toor dal being an important source of protein (usually 25% of protein by weight) in a vegetarian diet, is used in most of the south-Indian recipes, like sambar, rasam, kootu etc. Paruppu thogayal is a wet mixture of toor dal & spices used as a rice mix with milagu kuzhambu on the side.


Paruppu podi is the recipe where toor dal is dry roasted with other spices and ground into fine dry powder (slightly towards the coarser side). Then, this powder/podi is mixed with rice with a dab of ghee / gingelly oil and consumed with sutta (fire-roasted) appalam on the side. As simple as it sounds, this is also very tasty & nutritious. Healthy alternate to break your usual sambar-rasam routine.


My mom always keeps a bottle of paruppu podi in stock, that comes really handy while she 's not around to cook for us. Me & my brother are suckers for our mom 's simplest, down-to-earth form of this recipe, and I especially love it with poricha kuzhambu / plain yogurt on the side!

Basic Info
Complexity - Simple
Prep time - 30 mins (includes cooling time)
Cook time - 5 mins
Serves - approx. 1 cup

Ingredients
Toor dal - 1 cup
Black peppercorns - 1 tsp
Dry red chilli - 1 no
Salt to taste

Method
Dry roast toor dal, black peppercorns, dry red chilli until toor dal is golden brown. Let it cool to room temperature and grind into a fine powder.


If you store paruppu podi in a dry air-tight container, and use only dry spoons, it can stay good for months together.

Variations
- Dry roast 2-3 sprigs of curry leaves along with the dal and grind.
- Cumin seeds (~2 tsp) also makes a flavorful addition.
- Mix 2 big pinches of hing to the podi to aid in better digestion.
- Dry roast 6-8 cloves of garlic until crisp and grind it along with toor dal for the famous "Andhra Pappu".
- However you mix & match the above ingredients, you will always end up with a flavorsome, protein-packed paruppu podi.

Home-made Tortillas

Tortillas, being the staple food of Mexicans, is the first thing that you need to work with Mexican recipes like tacos, burritos, chalupas, enchiladas etc. Soft/Medium, Small/Large, Flour/Corn/Wheat/Multi-grain -  yeah, there are lot of commercial tortillas available in the market. But, why buy them, when you can reproduce the same authentic taste at home, that too for less! 

Home made tortillas are way too thin, soft, chewy & simple!


Basic Info
Complexity - Simple
Prep time - 20 mins
Cook time - 30 mins
Serves - 8 tortillas

Ingredients
All-purpose flour - 2 cups
Salt - 1/2 tsp
Water - 3/4 cup
Olive oil - 3 tbsp

Method
In a large bowl, mix flour and salt. Stir in water and oil. Knead for about 10-12 mins until smooth on a floured surface (add little flour or water if needed). Let it rest for 10 mins. 

Divide dough into eight portions. On a lightly floured surface, roll each portion into 7-inch discs. 

Heat a skillet, cook tortillas over medium heat for 1 minute on each side or until lightly browned. Keep them warm covered in aluminium foil / tortilla warmer.


Tips to get thin/soft tortillas
- Use a circular rolling board & rolling pin.
- Flour the surface before starting to roll-out.
- Initially, flatten the ball of dough and roll it into 3-4 inch thickness.
- After this, do not pick up the tortilla by hand. Due to its elastic nature, tortilla tends to spring back to its original size.
- For thinner tortillas, roll it outward from the center, rotating the rolling board occasionally to form an even circle.
- Roll it out as thin as possible.
- Cook tortillas on medium heat. High heat tends to cook tortillas faster.